As human-centered designers we value consistent and accurate feedback on our work. We routinely speak with the people that use the sites and apps we create to understand how we can make these experiences better meet their needs. At Cake & Arrow, a typical project includes 6 to 7 customer touch points, each designed to deepen our understanding of customer needs, push the work forward, and ensure that what we build delivers on strategy.
Research events can vary in size and purpose. Initial mental model interviews help us understand our customer’s mindset. Concept and prototype testing allow us to validate assumptions and refine our ideas.
Finding Quality Participants
We’ve spent a good amount of time refining our workflow. Spinning up a testing event now takes a matter of days, not weeks. Our small team handles everything in-house. We can quickly create a screener, test plan, and coordinate a research event. Yet, finding a steady stream of qualified participants continues to be a challenge.
For our projects to run at a brisk pace, it’s important for us to find a consistent source of participants. We work with a wide range of client industries and need access to users with a variety of backgrounds. In the past, we’ve bootstrapped our recruiting process: we’ve posted ads to Craigslist; hired a third-party recruiting firm; and deployed Ethn.io screeners to our clients’ websites. While these techniques worked at the time, they were costly, inefficient, and time consuming.
Most recently we’ve turned to our partner Respondent.io for our recruiting needs. We’ve found that they deliver high-quality participants in a short time frame and at a good cost. They also tackle all the reminders and follow-ups with participants.
A Simplified Workflow with Respondent.io
Our partnership with Respondent has allowed our research practice to sky rocket. Using Respondent, we’re now able to run more testing events in a shorter timeframe than ever before. Our meticulous yet efficient approach to user testing gives our clients the confidence that their product has been fully validated prior to launch.
In the past year, Respondent has handled over a dozen recruits for us. We have been very impressed by their speed and the quality of the participants. They continue to evolve their platform and capabilities, deploying new features constantly. And, while their service is great, we found that their interface can at times be confusing for new users.
Below are key tips that I’ve picked up this past year to help other UX professionals like me leverage their next recruit with Respondent.io.
Creating a Screener
A well-designed screener is the first step towards finding candidates that match your target. The sweet spot is 5–10 questions that hone in on your desired characteristics, such as age range, familiarity with your products or services, marketing demographics, etc.
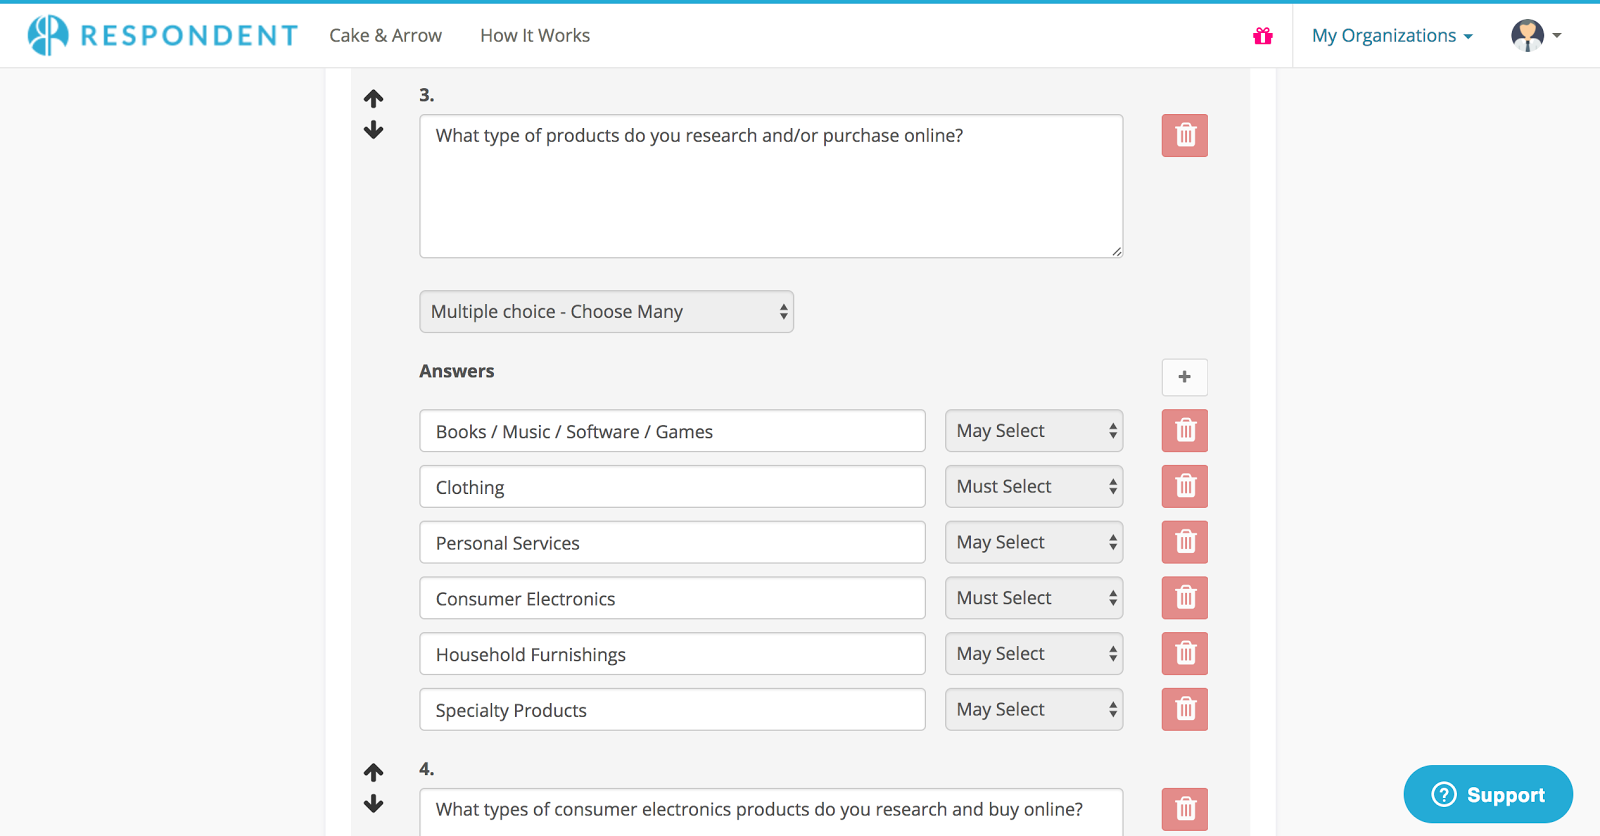
To start a recruit, you need to create a screener survey using Respondent’s form builder, which offers limited functionality. For example, you cannot copy and paste content into the form. It also only offers two question types:
- Multiple Choice Questions. We use these exclusively to ensure that participants match our target profile. When creating the test, you can specify whether responses pass or fail participants. Creating a wide yet narrow path to qualify for a research event is a skill that takes practice.
- Open-Ended Questions. This type of question does not help qualify a participant. We don’t recommend using them unless you need details that can’t be captured with a multiple choice question.
In our experience, it has been far easier to iterate on a screener in Google Docs. The site allows us to use its collaboration features before loading the form into Respondent’s interface.
Reviewing Potential Candidates
A Respondent screener, deployed for two to three days, will yield 50–60 qualified participants. Your next step is to review all submissions to find enough quality participants for your research event.
All participants on Respondent are verified by LinkedIn. Responses include each participant’s location, current employer, and job title. I often do a first pass on this information to ensure we’re reviewing only qualified candidates.
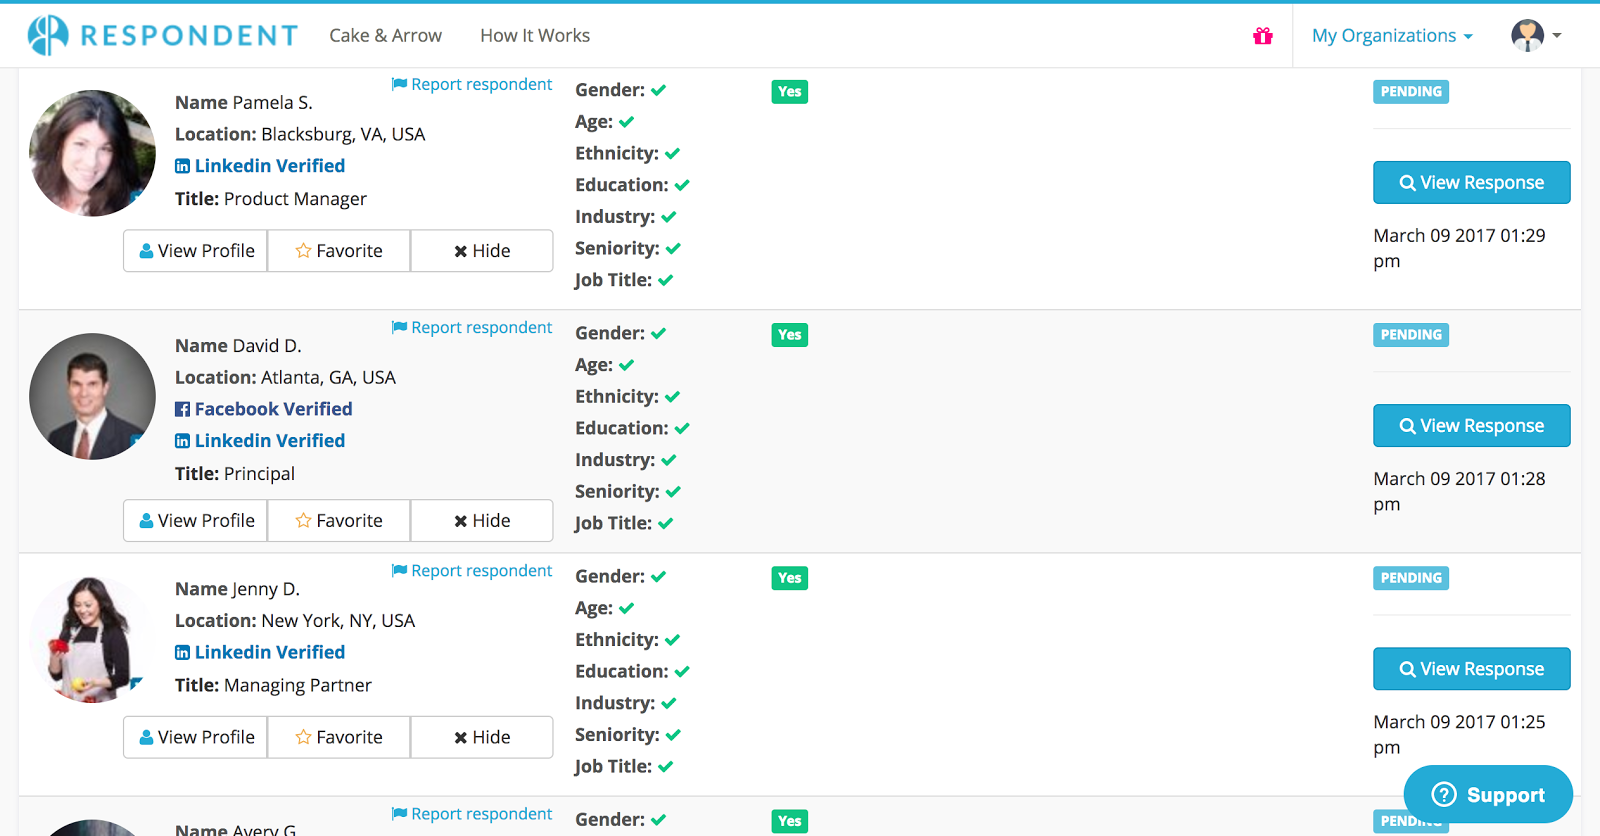
Respondent’s web interface for evaluating participants lacks core functionality. The site displays limited data by default, and hides screener responses in a pop-up window. The lack of useful filters makes it difficult and time consuming to compare responses.
I found the best way to review participants is to use the CSV the site provides. I upload the document to Google Sheets and use its filtering capabilities to find a good participant mix.
As a sign of Respondent’s terrific customer service and rapid iteration, the CSV download was a feature they added at my request last year. It has been crucial to our workflow ever since.
Scheduling Your Sessions
Your last step is scheduling your favorite participants for testing. Respondent offers a calendaring solution that makes it easy for researchers to create a flexible schedule. The site allows you to choose the dates and times that your team is available. If you let it, the site has robust features that can also set up time slots and availability based on participants’ selections.
I found it best to define the exact dates and times our team is available. This has made it far easier to invite our client partners to sit in on testing events. They enjoy hearing the feedback first-hand, and their active participation helps settle design debates throughout the project.
On several occasions we’ve had the need to run parallel research tracks on the same day. For two researchers we’ll create separate dial-ins that need to be coordinated with participants. It’s not immediately obvious how to set this up on Respondent.io. Should you have the need, here are two workarounds that I learned from the team at Respondent:
- Create two separate calendars and manage participants separately. During project setup, indicate that dial-in details will be provided in the invite. Then create two calendars. Edit the “special instructions” in each calendar to reflect the unique dial-in details. When participants are invited they will see the dial-in specific to each calendar.
- Use a single calendar and manually send out the dial-in before each session. When setting up your calendar set the “group bookings” to two. This means two people can book any single slot. This is the less automated approach. You’ll have to send emails ahead of each interview with the correct dial-in information.
–
While the interface does require some workarounds, we appreciate the robust capabilities Respondent has to offer, and, when it comes to recruiting testing participants, they are still far superior to any other tools out there.
We like how quickly the company iterates on its own product and anticipate that many of the issues with their interface will be resolved over time. The company’s website and participant panel has enabled us to work faster, do more with less, and obtain the valuable feedback we need to continue building sites that people love. We can definitely recommend them for your future recruiting needs.